New_Face failed error when using Mplayer

After upgrading from openSUSE 10.2 to openSUSE 10.3 I got the error message New_Face failed. Maybe the font path is wrong. Please supply the text font file (~/.mplayer/subfont.ttf) when starting up MPlayer to watch video files. MPlayer would run fine and show the video and play sound ok, but the on screen display would fail to display anything; the subfont.ttf it was trying to find is what was used for the on screen display.

New_Face failed. Maybe the font path is wrong.

The error message that was displayed when starting up MPlayer.

no on screen display

No on screen display text showing.

I can only guess that the compiled in settings for MPlayer had changed with this version on openSUSE, or it had done something to the configuration files or font files during the upgrade which caused this issue.

After a quick search for the above error, and then some messing around with font and configuration files, I managed to work out that MPlayer checks a number of locations to determine which font to use, in the following preference order:

  • user defined configuration file: ~/.mplayer/config
  • common system configuration file: /etc/mplayer/mplayer.conf
  • user defined font file, or symbolic link: ~/.mplayer/subfont.ttf
  • system defined font file, or symbolic link: /usr/share/mplayer/subfont.ttf

The exact location of the system configuration files will vary depending on your Linux distribution; for example /usr/share/mplayer above may instead be at /usr/local/share/mplayer. Doing locate mplayer.conf and locate share/mplayer from the command line should help you to find them.

To find the TTF fonts on your system, do locate .ttf and you’ll be returned with a list of files found that have .ttf in them, similar to the following extract:

/usr/share/fonts/truetype/albw.ttf
 /usr/share/fonts/truetype/albwb.ttf
 /usr/share/fonts/truetype/albwbi.ttf
 /usr/share/fonts/truetype/albwi.ttf
 /usr/share/fonts/truetype/andalemo.ttf
 /usr/share/fonts/truetype/andybol_.ttf
 /usr/share/fonts/truetype/andyreg_.ttf
 /usr/share/fonts/truetype/ansbi___.ttf
 /usr/share/fonts/truetype/ansb____.ttf
 /usr/share/fonts/truetype/ansi____.ttf
 /usr/share/fonts/truetype/ans_____.ttf
 /usr/share/fonts/truetype/arblwgl.ttf
 /usr/share/fonts/truetype/arial.ttf
 /usr/share/fonts/truetype/arialbd.ttf
 /usr/share/fonts/truetype/arialbi.ttf
 /usr/share/fonts/truetype/ariali.ttf
 /usr/share/fonts/truetype/ariblk.ttf
 

It’s then just a matter of selecting which font to use, and adding the following line(s) to the appropriate configuration file:


font=/usr/share/fonts/truetype/arial.ttf
subfont-text-scale=2.5

Note that’s it’s possible to change the size of the font in the on screen display using the “subfont-text-scale” property as show in the above example.

If you instead prefer to use a symbolic link to the TTF file, although I would recommend you use the configuration files instead as you then also have control over the font size, you would do this, substituting the correct paths:


ln -s /usr/share/fonts/truetype/arial.ttf ~/.mplayer/subfont.ttf
OR
sudo ln -s /usr/share/fonts/truetype/arial.ttf /usr/share/mplayer/subfont.ttf
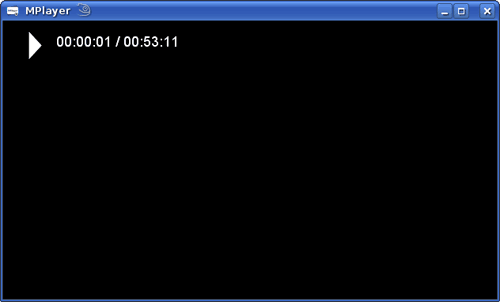
the problem is fixed

The problem is fixed and the on screen display text is now showing.

Please note: if you are using GMPlayer (the GUI version of MPlayer) then you don’t need to resort to editing text files or creating symbolic links. If you right-click the player and select “Preferences” and then select the “Font” tab, you can set the font and scale there.


VMWare USB device issues on openSUSE 10.3

After I unwittingly upgraded from openSUSE 10.2 to openSUSE 10.3, I wasn’t able to configure VMWare Workstation 6.0 on openSUSE 10.3 so ended up downloading the updated 6.0.1 version of VMWare Workstation. This fixed my issue with being able to configure it and run my guest operating systems but changing from the 2.6.18 kernel to 2.6.22 appears to have introduced another issue.

Note: I have found the solution to the issue. Refer to the 04 October Update below for more details.

I print directly onto CDs and DVDs using a Canon Pixma ip4300 printer when producing Linux CDs for my Linux CD Mall website. There are printer drivers available from Turboprint for Linux for this particular printer but I’ve found it’s easier to simply connect the printer to the Windows XP guest and use the drivers in Windows instead of in the Linux host. The CD printing software also only runs on Windows so I need to run that in the guest operating system anyway.

After getting VMWare running again, I went to print a CD label and discovered the printer wasn’t connected. This isn’t unusal because I’ve often found after not using the guest for a few hours the USB connection seems to somehow become disconnected. All I need to do to connect the printer back to the guest is to select VM -> Removable Devices -> USB Devices from the Vmware Workstation file menu and then select the printer.

I went to do this but there was nothing listed under the USB Devices submenu; it just said “empty”. I verified the printer was actually connected to the computer, and checked the Linux system log to see that it was registering the device.

The output from the system log when I pulled the USB cable out of the computer was as follows:

Sep 20 11:19:10 desktop kernel: usb 2-7.3: USB disconnect, address 13

And the output when I plugged it back in again was as follows:

Sep 20 11:19:15 desktop kernel: usb 2-7.3: new high speed USB device using ehci_hcd and address 15
Sep 20 11:19:15 desktop kernel: usb 2-7.3: new device found, idVendor=04a9, idProduct=10b6
Sep 20 11:19:15 desktop kernel: usb 2-7.3: new device strings: Mfr=1, Product=2, SerialNumber=3
Sep 20 11:19:15 desktop kernel: usb 2-7.3: Product: iP4300
Sep 20 11:19:15 desktop kernel: usb 2-7.3: Manufacturer: Canon
Sep 20 11:19:15 desktop kernel: usb 2-7.3: SerialNumber: 9128CC
Sep 20 11:19:15 desktop kernel: usb 2-7.3: configuration #1 chosen from 1 choice
Sep 20 11:19:15 desktop kernel: drivers/usb/class/usblp.c: usblp0: USB Bidirectional printer dev 15 if 0 alt 0 proto 2 vid 0x04A9 pid 0x10B6

So all looking good there. But the Removable Devices -> USB Devices was still showing “empty”.

I did a fair bit of searching on the Internet and couldn’t find any resolution, although it does appear that the location of USB devices may have changed between openSUSE 10.2 and 10.3, kernels 2.6.18 and 2.6.22 which may be causing the issue: VMWare isn’t sure where to pick the information up from.

Not quite sure what to do next, I thought maybe I should try plugging in another USB device and see if it can detect that. So I pulled out a USB memory stick, unplugged the printer and plugged in the memory stick. Nope, still didn’t detect it. The USB connection I plug my printer into is on the monitor, so I wondered if plugging the USB stick into one of the ports on the front of the computer might make a difference. I plugged the printer back in, and then plugged the stick into one of the front ports.

When I checked Removable Devices -> USB Devices again there was no memory stick, but to my surprise the printer was now there… I’ve messed around with this a little, and as long as I have the focus on the virtual machine, have some other USB device also attached, unplug the printer, leave the cable out for a few seconds and then plug it back in again, I seem to be able to connect the printer to the guest, although sometimes it takes a couple of goes. Hopefully this issue will be fixed in later revisions of VMWare Workstation, or in kernel updates.

Update 28 September 2007

I did an update today which updated the kernel from 2.6.22.5-18-default to 2.6.22.5-29-default and it seems to have fixed this issue, ie I no longer seem to have issues connecting the printer to the virtual machine.

Update 01 October 2007

Hmm maybe not, it’s still completely random about whether it works or not. Sometimes I have to plug, unplug, plug, unplug devices etc etc to get it to see any USB devices. And sometimes I can only get it to work with a reboot of the guest operating system. What a pain.

Update 04 October 2007

I found this page in the VMWare knowledge base which talks about the issue and the solution. It appears to come down to some Linux distros (such as openSUSE which I am currently using) not mounting the usb filesystem at /proc/bus/usb automatically.

The line in the /etc/fstab file which deals with this is as follows:

usbfs/proc/bus/usbusbfsnoauto 0 0

Changing it to the following will fix the issue out on reboot:

usbfs/proc/bus/usbusbfsauto 0 0

To fix the issue without rebooting (although you still need to modify /etc/fstab so it still works on restart) you need to mount the usbfs like so, either as root or using sudo:

mount /proc/bus/usb

The knowledge base post says to do this mount -t usbfs none /proc/bus/usb but it didn’t seem to work for me, so I umounted it and then did as in the block above. I also shut down all guest operating systems and restarted the VMWare Workstation client. Once it started up again I was able to access all the connected USB devices.

mysql_upgrade relocation error

After upgrading openSUSE 10.2 to 10.3 my MySQL database server wouldn’t start. I didn’t even notice it wasn’t running until I went to do some development work on one of my websites and it wouldn’t connect to the MySQL database.

The MySQL server daemon wasn’t running, although it’s set to start up automatically by the init scripts when the system first boots up, so I was a little surprised. I dropped to a command prompt and issued the command:

/etc/init.d/mysql start

and was surprised to get the following message:


Updating MySQL privilege database...
/usr/bin/mysql_upgrade: relocation error: /usr/bin/mysql_upgrade: symbol dynstr_append_os_quoted, version libmysqlclient_15 not defined in file libmysqlclient.so.15 with link time reference
failed

I was a little puzzled by the error message, so decided to check out the /usr/bin/mysql_upgrade file, thinking it might be some sort of readable shell script, but it was a binary file, which obviously had some sort of error interfacing with the MySQL libraries.

Then followed a lot of messing around, including taking a backup copy of the databases and loading them into a fresh MySQL data directory, ie replacing what was at /var/lib/mysql with a new default database layout, and then creating and loading the databases from the backup files. I didn’t have any issues with the fresh copy of the database, so went back to the version that wasn’t working.

For some reason or other, I decided to check the files in the MySQL data directory, like so:

sudo ls -la /var/lib/mysql

and got a listing similar to the following:

total 28900
 drwx------ 2 mysql mysql4096 2007-09-21 11:42 adatabase
 drwx------ 2 mysql mysql4096 2007-09-21 11:42 another_db
 -rw-rw---- 1 mysql mysql6 2007-09-21 11:36 desktop.pid
 drwx------ 2 mysql mysql4096 2007-09-21 11:42 efghijklmn
 -rw-rw---- 1 mysql mysql 18874368 2007-10-05 18:55 ibdata1
 -rw-rw---- 1 mysql mysql5242880 2007-10-05 18:55 ib_logfile0
 -rw-rw---- 1 mysql mysql5242880 2007-10-05 18:55 ib_logfile1
 drwx------ 2 mysql mysql4096 2007-09-21 11:44 mysql
 drwx------ 2 mysql mysql4096 2007-09-21 11:44 mysql_bak
 -rw-rw---- 1 mysql mysql1594 2007-10-05 18:55 mysqld.log
 -rw-rw---- 1 mysql mysql1859 2007-09-28 13:17 mysqld.log-20070921
 -rw-rw---- 1 mysql mysql1026 2007-10-02 10:39 mysqld.log-20070928
 -rw-rw---- 1 mysql mysql1539 2007-10-04 11:01 mysqld.log-20071002
 -rw-rw---- 1 mysql mysql1026 2007-10-05 17:57 mysqld.log-20071004
 drwx------2 mysql mysql4096 2007-10-05 18:55 .protected
 -rw-r--r--1 mysql mysql0 2007-10-05 17:57 .run-mysql_upgrade
 drwx------ 2 mysql mysql4096 2007-09-21 12:47 test
 drwxr-xr-x2 mysql mysql4096 2007-10-05 18:55 .tmp
 

The file that interested me the most was the one named .run-mysql_upgrade. Clearly from the name this is what was causing the /usr/bin/mysql_upgrade to run, and for whatever other reason it was erroring out. So I reasoned it would just be a matter of deleting (or backing up somewhere else) this file and then attempting to start MySQL again.

$ sudo rm /var/lib/mysql/.run-mysql_upgrade
 $ sudo /etc/init.d/mysql start
 Starting service MySQLdone
 

And sure enough, that fixed the problem.

Yum sqlite database disk image is malformed error

When trying to install something this morning using yum on a CentOS 5 machine, I got the error message “_sqlite.DatabaseError: database disk image is malformed” as shown below:

$ yum install vsftpd
 Loading "installonlyn" plugin
 Setting up Install Process
 Setting up repositories
 base100% |=========================| 1.1 kB00:00
 updates100% |=========================|951 B00:00
 centosplus100% |=========================|951 B00:00
 addons100% |=========================|951 B00:00
 extras100% |=========================| 1.1 kB00:00
 Reading repository metadata in from local files
 Traceback (most recent call last):
 File "/usr/bin/yum", line 29, in ?
 yummain.main(sys.argv[1:])
 File "/usr/share/yum-cli/yummain.py", line 94, in main
 result, resultmsgs = base.doCommands()
 File "/usr/share/yum-cli/cli.py", line 381, in doCommands
 return self.yum_cli_commands[self.basecmd].doCommand(self, self.basecmd, self.extcmds)
 File "/usr/share/yum-cli/yumcommands.py", line 134, in doCommand
 return base.installPkgs(extcmds)
 File "/usr/share/yum-cli/cli.py", line 539, in installPkgs
 self.doRepoSetup()
 File "/usr/share/yum-cli/cli.py", line 109, in doRepoSetup
 self.doSackSetup(thisrepo=thisrepo)
 File "/usr/lib/python2.4/site-packages/yum/__init__.py", line 341, in doSackSetup
 self.pkgSack.excludeArchs(archlist)
 File "/usr/lib/python2.4/site-packages/yum/packageSack.py", line 331, in excludeArchs
 sack.excludeArchs(archlist)
 File "/usr/lib/python2.4/site-packages/yum/sqlitesack.py", line 587, in excludeArchs
 cur.execute(querystring)
 File "/usr/lib/python2.4/site-packages/sqlite/main.py", line 244, in execute
 self.rs = self.con.db.execute(SQL)
 _sqlite.DatabaseError: database disk image is malformed

This is easy to fix by issuing the following command:

yum clean all

After running this I got the following message, and I was able to install software again using Yum:

Loading "installonlyn" plugin
Cleaning up Everything

This error could happen on any Linux distribution that uses Yum for package management, such as Red Hat Enterprise Linux, CentOS 5, Fedora and its derivatives.

Java error executing Zend Studio

After I unwittingly upgraded from openSUSE 10.2 to openSUSE 10.3, I wasn’t able to run Zend Studio 5.5.0. I would click the icon to start it up and nothing would happen; even the splash screen would not appear. I opened up a command prompt and ran Zend Studio from there, assuming I might get some sort of error output. Sure enough:


$ /path/to/ZendStudio-5.5.0/bin/ZDE
java: xcb_xlib.c:52: xcb_xlib_unlock: Assertion `c->xlib.lock' failed.
Aborted

Hmm, that looks like some sort of Java error to me. Given that I’d just done a big update to my operating system I thought that maybe Java had become screwed up or something, so the first thing I did was to reinstall it (I’d had some success in removing and then reinstalling some of the corrupted software from my upgrade). That didn’t make any difference though, and I still got the same error.

So I plugged the error message into Google and first result was this page on the Sun Developer Network site. I didn’t actually bother reading the text on the page, just did a Ctrl+F to find the error message on the page, which happened to be in the user submitted comments under the bug report. I scrolled down, scanning the posts for any useful information until I spotted a post that said: “I have the same problem with OpenSuSE 10.3. The sed-workaround works for me.”

Aha! so a quick search on the page for “sed” and I spotted this post:


I worked with jcristau and christoph4 via IRC on #debian-x, and we managed to
track down the problem with broken locking in Sun Java 1.5 and 1.6.It only
occurs if Java finds the Xinerama extension, at which point it does something
broken with locking and triggers the assertion.If Java never finds the
Xinerama extension, it doesn't trigger the assertion for broken locking.

The following workarounds address this problem:

For sun-java5-bin:
sed -i 's/XINERAMA/FAKEEXTN/g' /usr/lib/jvm/java-1.5.0-sun-1.5.0.11/jre/lib/i386/xawt/libmawt.so

For sun-java6-bin:
sed -i 's/XINERAMA/FAKEEXTN/g' /usr/lib/jvm/java-6-sun-1.6.0.00/jre/lib/i386/xawt/libmawt.so

The same fix (applied to the appropriate file) might work for other
proprietary JDKs.

I ran

sed -i 's/XINERAMA/FAKEEXTN/g' /usr/lib/jvm/java-1.5.0-sun-1.5.0.11/jre/lib/i386/xawt/libmawt.so

as the root user but got the following error message:


sed: can't read /usr/lib/jvm/java-1.5.0-sun-1.5.0.11/jre/lib/i386/xawt/libmawt.so

I used “find” the locate the actual location of the file:


find /usr/lib64/jvm -name "libmawt.so"
/usr/lib64/jvm/java-1.5.0-sun-1.5.0_update8/jre/lib/amd64/headless/libmawt.so
/usr/lib64/jvm/java-1.5.0-sun-1.5.0_update8/jre/lib/amd64/motif21/libmawt.so
/usr/lib64/jvm/java-1.5.0-sun-1.5.0_update8/jre/lib/amd64/xawt/libmawt.so

and then ran the sed command again like so:


sed -i 's/XINERAMA/FAKEEXTN/g'
/usr/lib64/jvm/java-1.5.0-sun-1.5.0_update8/jre/lib/amd64/xawt/libmawt.so

However, Zend Studio still wouldn’t run, exiting with the same java: xcb_xlib.c:52: xcb_xlib_unlock: Assertion `c->xlib.lock' failed error message. I figured Zend must have its own copies of those Java files so another find on the directory Zend Studio is installed to turned up with:


$ find /path/to/ZendStudio-5.5.0 -name "libmawt.so"
/path/to/ZendStudio-5.5.0/jre/lib/i386/xawt/libmawt.so
/path/to/ZendStudio-5.5.0/jre/lib/i386/motif21/libmawt.so
/path/to/ZendStudio-5.5.0/jre/lib/i386/headless/libmawt.so

So I ran the sed command again on the Zend Studio version of the file:


sed -i 's/XINERAMA/FAKEEXTN/g' /path/to/ZendStudio-5.5.0/jre/lib/i386/xawt/libmawt.so

and this time Zend Studio was able to run. Yay!

Seg fault or similar nasty error detected in the parent process

One of the servers I manage runs CentOS 5.0 with Apache 2.2 and PHP 5.1.6, and uses PHP’s APC 3.0.14 (Alternative PHP Cache). We process the logs using AWStats every 15 minutes, and rotate the logs on a daily basis. However, after two or three days of working correctly, Apache would crash and we’d get the following in the log files: “seg fault or similar nasty error detected in the parent process”

After some amount of searching on the Internet, the only thing I could come up with was that there was a bug in the PCRE extension in older versions of PHP that would cause the same message to occur in the error logs. One of the posts indicated that this particular message is also a symptom for lots of other memory-type bugs in Apache, so I can only assume that it’s the use of APC which is causing the error.

The interesting thing is that if Apache is reloaded or reloaded with “graceful” a few minutes later, then there aren’t any segfaults. Again, I can only guess that the memory issue causing the segfault is due to issues with the memory caching over time.

The script that processes the logs with AWStats, and also rolls the logs on a daily basis is as follows:

#!/bin/bash
 
 if [ `date +%H%M` == 0600 ]
 then
 mydate=`date +%Y%m%d`
 cd /var/log/httpd
 mv mylog.log mylog.log.$mydate
 /sbin/service httpd reload
 /var/www/awstats/cgi-bin/awstats.pl -update 
 -config=myconfig -LogFile=mylog.log.$mydate > /dev/null
 bzip2 mylog.log.$mydate
 else
 /var/www/awstats/cgi-bin/awstats.pl -update 
 -config=myconfig > /dev/null
 fi

A quick summary of what this is: if it’s 6am in the morning, the current log file is renamed with the current day’s date (eg mylog.log.20070921), processed using AWStats, and then compressed with bzip2. At all other times during the day, just AWStats is called.

The error message that I got in the log files was as follows:

[Fri Sep 21 06:00:03 2007] [notice] SIGHUP received. ?Attempting to restart
 [Fri Sep 21 06:00:03 2007] [notice] seg fault or similar nasty error detected in the parent process

After the attempt to reload Apache and getting this error message, Apache failed to start up again. Calling “service httpd start” got it running again.

The solution I have found is to stop and start Apache. There may be some other way of sorting this memory issue with APC out but I was unable to find a solution for it. So the script now looks like this:

#!/bin/bash
 
 if [ `date +%H%M` == 0600 ]
 then
 mydate=`date +%Y%m%d`
 cd /var/log/httpd
 mv mylog.log mylog.log.$mydate
 /sbin/service httpd stop
 /sbin/service httpd start
 /var/www/awstats/cgi-bin/awstats.pl -update 
 -config=myconfig -LogFile=mylog.log.$mydate > /dev/null
 bzip2 mylog.log.$mydate
 else
 /var/www/awstats/cgi-bin/awstats.pl -update 
 -config=myconfig > /dev/null
 fi

Since changing it, I have had no further segfaulting issues.