I’ve started using Aptana Studio 3 to try it out for a while and compare it with Netbeans because Netbeans is such a memory hog (although Aptana seems to be a CPU hog instead so far). This post shows how to set up a custom file extension association in Aptana Studio 3. The screenshots are from the Mac version but should be the same for other platforms too.
Preferences -> General -> Editors -> File Associations
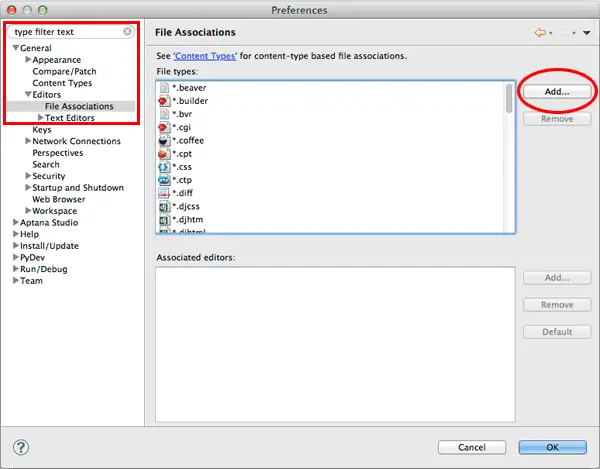
Open up the preferences dialog and navigation to General, the Editors, then File Associations as shown in the screenshot below. The navigation path is in the highlighted box on the left.
Then click the "Add" button to add a new file assocation.
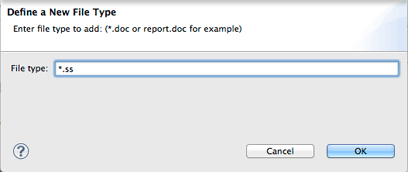
This opens up a new dialog where you enter the file type. In my case I wanted to make SilverStripe’s template files use the HTML editor so added *.ss as the file extension. Put whatever your custom extension is in here and click the "OK" button.
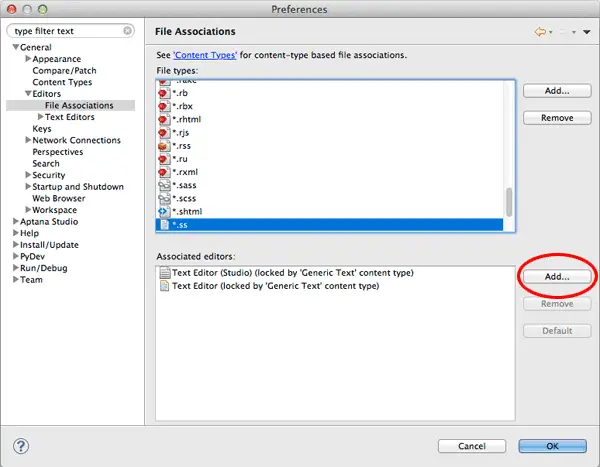
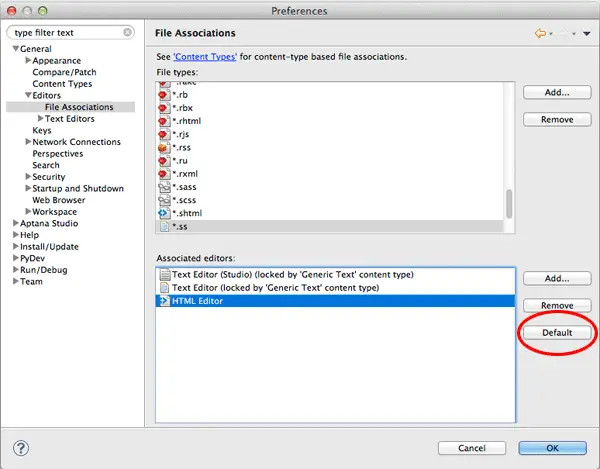
The main preferences window will have updated as show in the screenshot below, assigning some default editors as the associated ones. I assume for all new associations it uses the generic text editor. In order to assign a different editor, click the "Add" button.
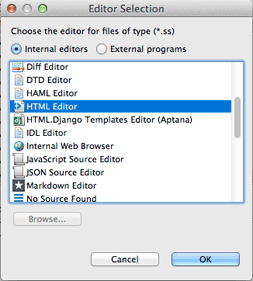
The next dialog is where you choose which editor to use – it can either be an internal Aptana editor, or an external application. In my case, I wanted to open .ss files with the HTML editor so scrolled down and found this, then clicked the OK button. This is shown in the next screenshot below.
Once again you return to the main preferences window and the associated editors section is now updated with the newly associated editor at the bottom. You don’t appear to be able to drag and drop the order but by clicking hr "Default" button it will go to the top and be the one used when opening files with this extension.
You’ll then need to close any documents with that file extension and re-open them for them to use the newly associated editor.
