Yesterday I looked at how to Optimize a table in MySQL from the command line interface and today will look at how to do the same thing with phpMyAdmin. This means you can just point and click in a web based interface instead of having to remember the commands and type them in.
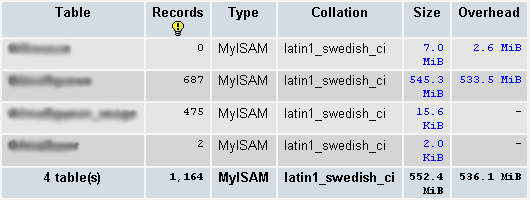
To check if there’s a lot of wasted free space in any of your MySQL tables, log into phpMyAdmin and select your database. The initial view in the right frame is a list of all the tables in the database and shows an overview of each table including the number of records, size and overhead. This is shown in the screenshot below.

The second table in the above example has just 687 records and is taking up 545.3 MB. There’s 533.5MB of "overhead" meaning free space which isn’t being used at all but is taking up disk space. This table clearly isn’t optimal so follow the steps below to optimize it.
Select the appropriate table by clicking one of the buttons alongside its name (one of the browse, structure, search or insert buttons) and the click the "Operations" button/tab at the top of the page. (Don’t click the "Operations" tab on table list page as it will show a different set of operations which relate to the database as a whole instead of the specific table).

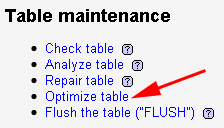
Now scroll to the bottom of the page until you find the "Table maintenance" options as shown in the screenshot below. To optimize the table click the "Optimize table" link.

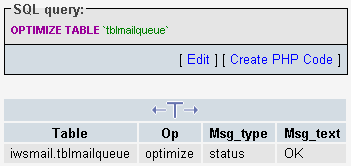
The table will then be optimised and then after a few seconds the page will display the query as shown in the screenshot below.

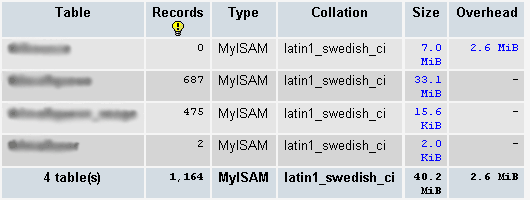
If we then return to the page displaying the complete list of tables we can now see the table is only 33.1MB in size and there’s no overhead.

If you have phpMyAdmin installed this is a much easier method than doing it from the command line because you can easily see which tables need to be optimised and easily optimise them by just clicking a few links.
Tomorrow I’ll look at how to automatically optimize MySQL tables if they have become non-optimal using a PHP script.
